
Posted on December 5, 2018
This is a special guest post done in collaboration with Kara Murphy, known as @karaemurphy online.
The Holiday season is upon us. If you’ve learned how to create extraordinary drone photos, and consistently receive encouraging feedback, a print of your work is a stellar idea for a unique gift.
More people are taking to online platforms and setting up their own print shops to capitalize on peak consumer demand. If you’re interested in transforming a digital image into a tangible product, read on.
I picked up a drone for the very first time in June 2014 and was instantly hooked. The ability to capture a unique aerial perspective opened up a whole new realm of creative expression that continues to energize me to no end.
While I was moderately successful as a photographer and landed a few high-profile gigs working for major music festivals, no one had ever asked to buy an actual print of my work. As a result, I became accustomed to preparing photos for online outlets.
When friends, family, and my followers on Instagram took notice of my budding passion, they started inquiring about how they could purchase my aerial shots to hang on their walls.
For the first time ever, as a photographer, I had to figure out how to properly convert my online images to printable files.
Of course, there was some trial and error involved. Images that looked incredible on my phone and laptop screen didn’t always translate to a piece of art that was ready for display in the real world.
Surely enough, when my first batch of photos arrived in the mail from the printing lab, a few were pixelated, washed out, even grainy. That process taught me it was not enough to send off a file edited in Lightroom or Photoshop without key adjustments.
It is relatively easy to upload a photo to your phone, slap on a preset or filter, and make a few quick tweaks for a polished post that looks stellar on social media channels.
The real challenge is ensuring the qualities of an image displayed on a backlit computer screen transfer flawlessly to paper in a variety of finishes, canvas, and even metal.
If you’re ready to take your photos offline, I recommend following these steps to ensure you don’t waste an inordinate amount of time figuring out how to do it properly.
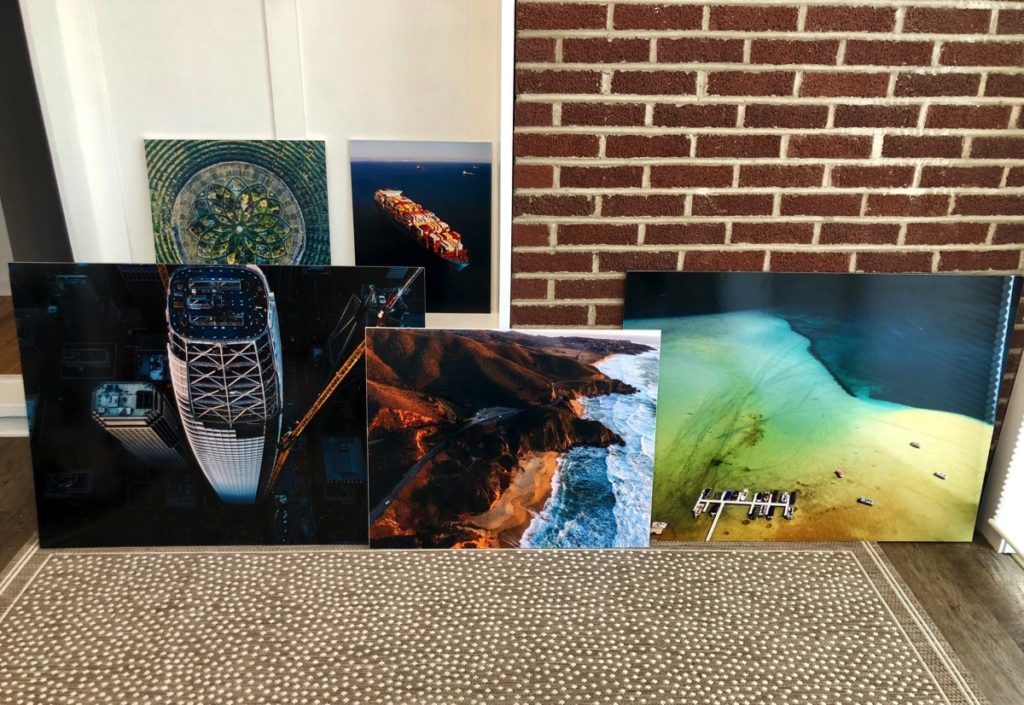
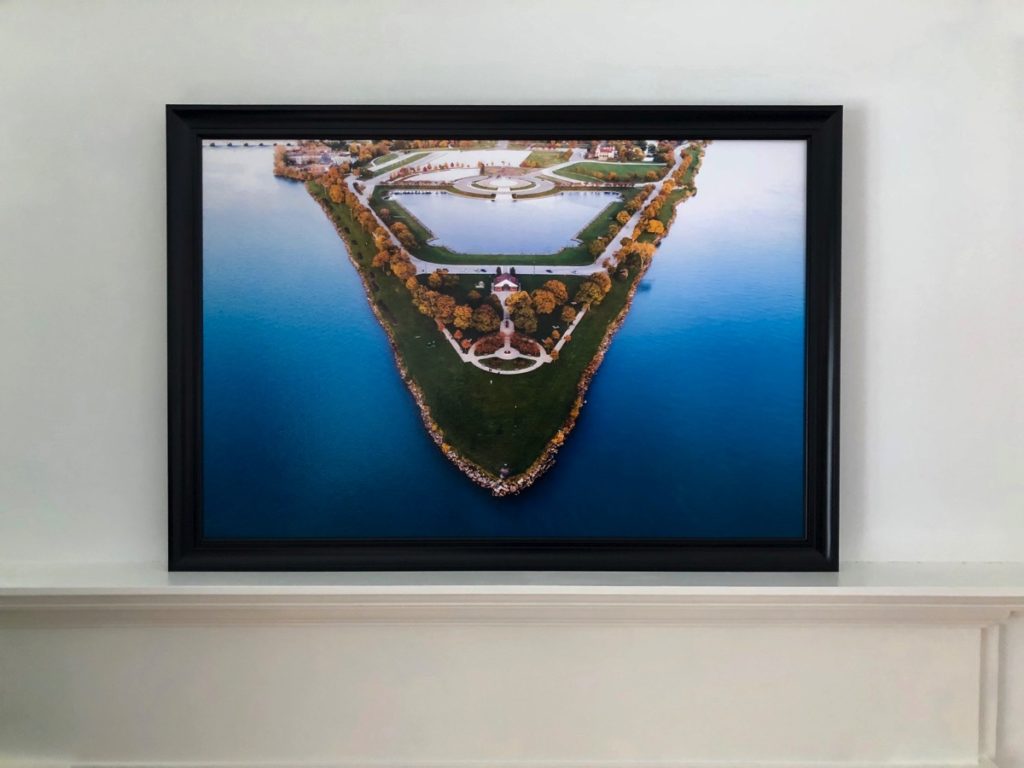
Some of my drone photos printed
Get Your Camera Settings Right
Before I get into the editing part, I want to focus on a few fundamentals for camera settings that will make the post-processing and preparation phase much more manageable.
Without taking these crucial steps, it’s going to be difficult, if not impossible, to transform an image into a print.
First and foremost, always shoot in RAW. Yes, the files will take up more space on your memory cards and hard drive but your ability to make sweeping adjustments, and correct for exposure, will more than compensate for a minor inconvenience.
JPEG files are compressed. Bit depth is drastically cut and your ability to make enhancements and modifications is significantly limited. It’s fine to save your final image as a .JPEG file, but don’t ever shoot in this mode.

Set your camera to shoot in the Auto Exposure Bracketing (AEB) mode. It will take 3 to 5 shots of the same picture with different exposure values (check out this post for more info on shooting in AEB mode).
There are photographers who insist on shooting in Auto to save time and maximize their time in the air, others prefer Manual. Either way, the final image may not resemble what appeared on your screen while shooting.
The ability to choose and even combine all of the takes into one High Dynamic Range (HDR) image or fill in compromised areas is key to creating a high-resolution image that can transform into a detailed, quality print.
Purchase a Monitor if You Don’t Have One Already
Laptops are portable and can be used virtually anywhere. Unfortunately, despite their convenience, they’re not the ideal device when it comes to preparing photos for print.
Higher pixel density, TN panels designed to enhance brightness while maximizing battery life, plus a glossy screen create an illusion of a sharper, more vibrant image.
A quality monitor, with its larger display, gives you the ability to thoroughly examine an image. It will reveal the shortcomings that a laptop or phone screen glossed over.
In my experience, you should pay at least $750 for a wide gamut model that can select from a palette of over a billion colors to project, especially when working with RAW files.
I purchased an Apple 27″ iMac with Retina 5K display which for me has meant that very little needs to be done with calibration (it runs a bit dark though).
For non-Mac users, the BenQ 4K PhotoVue Monitor Photographer Monitor is overwhelmingly recommended in every best current digital photography monitor roundup I’ve viewed.
The Dell UltraSharp U3415W is another one and runs around $799. I’m not an expert but from browsing forums, it feels like dipping below the $750 range gives users issues with excessive blue tones that can’t be easily fixed.
For more info check out the following helpful article: Best Monitors for Photo Editing.
Once purchased, you can’t simply unbox your monitor, plug it in, and start editing.
Most models are optimized to make movies, video games, and the Internet look attractive. Cool blue undertones and enhanced brightness are set by default to achieve this illusion.
When you neglect to calibrate and proof your monitor, you’ll be making editing decisions based on a false starting point.
Oftentimes, printed images will come back looking too yellow as a result for overcompensating on color correction. Or they’ll be underexposed, grainy, blurry, and washed out.
The entire purpose of calibration is to ensure the image printed on paper mirrors the file edited on screen.
Here are the preliminary steps to take in setting up this crucial process for Windows and Mac users. Purchasing a colorimeter is mandatory for accurate color reproduction.
There are a variety of options out there but the Spyder line of colorimeters is highly recommended by professionals and enthusiasts, alike, for their quality, accuracy, and affordability.
Formatting for Size
It’s not enough to simply save a file after editing in Adobe Lightroom, Photoshop, or comparable editing software and send it off to the printer.
It may work for a standard 8 x 10-inch photo but let’s say, for example, you want to enlarge an image to a 24 x 36 inches.
If it’s not resized for those specific dimensions, you’re going to end up with a grainy or pixelated print.
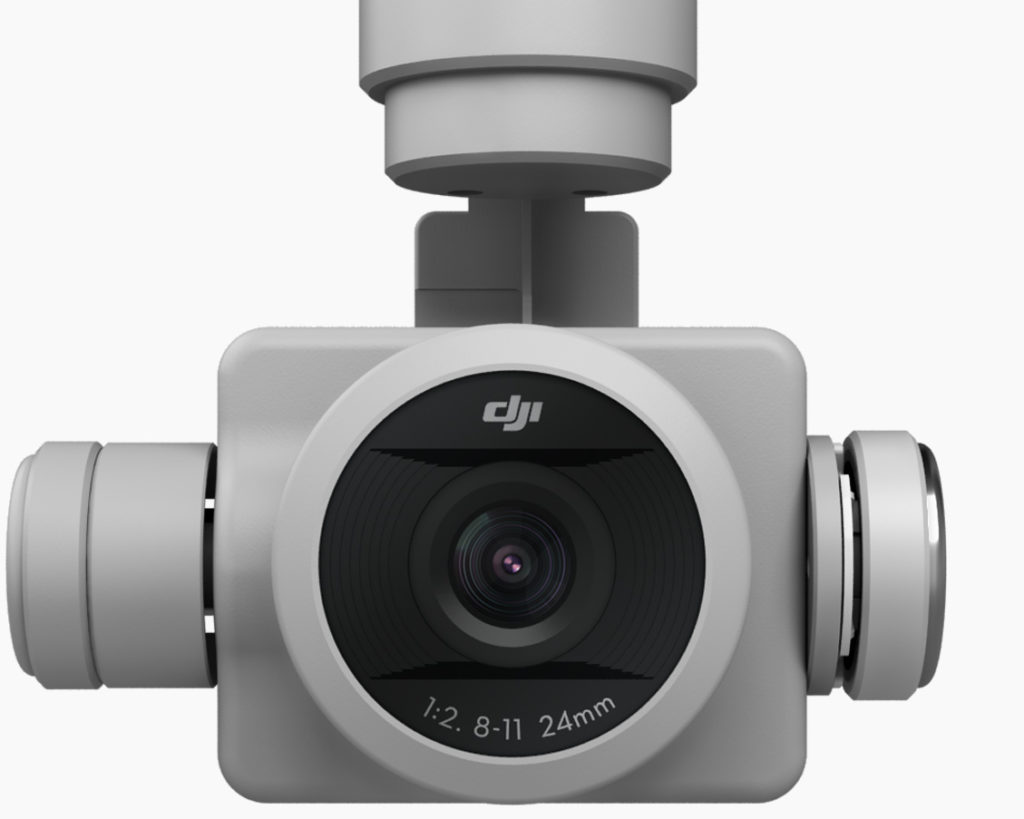
I have used a DJI Phantom 4 Pro for the better part of two years on almost all of my aerial photos. It boasts a 1” CMOS sensor with 20 million effective pixels, or, as we all know it, 20MP.
If I’m shooting an image with a 3:2 aspect ratio, the camera will produce 5,472 pixels horizontally, and 3,648 pixels vertically per row. When you multiply these numbers, you’ll get 19,961,856 total pixels contained in each image.
If I divide both 5,472 and 3,648 by 300, and round those numbers out, I could still print out a quality 18 x 12-inch image without adjusting the DPI or sharpness.
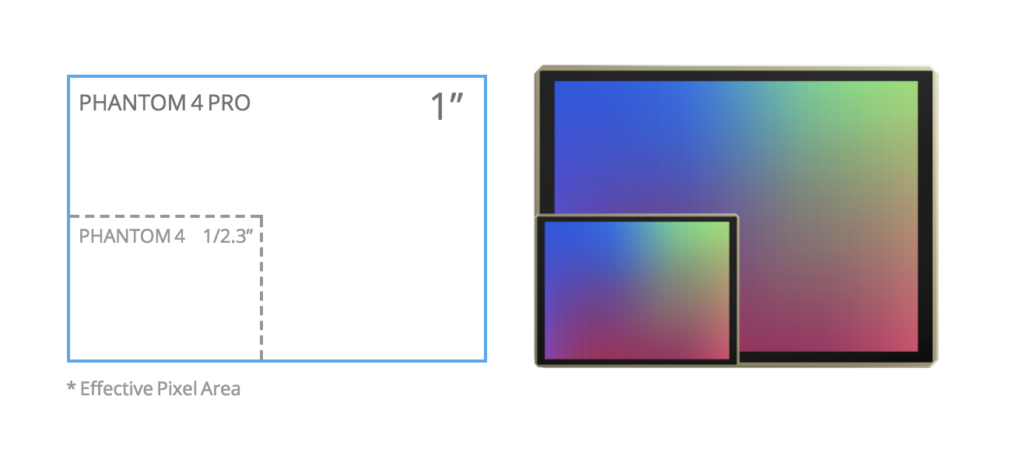
Size comparison between a 2.3″ sensor & 1″ sensor
Why divide these figures by 300? Anywhere between 240 and 300 DPI, or dots per inch, is the industry standard for printing photos that are crisp, clear, and can be viewed clearly at arm’s length.
300 DPI represents the number of dots printed inch of paper. The more dots, the less space between them, the smoother, more dense finish.
Taking the example from the paragraph before the last, if I were simply to send my 18 x 12-inch file to be printed as a 36 x 24 inches, effectively doubling the size without considering image resolution, the output would amount to 150 pixels per inch.
The result? A grainy, pixelated, poor-quality photo not fit to display unless you’re going for an abstract, unappealing look.
There are a variety of ways to resize photos. While Photoshop is the most renowned program to offer this option, it has its limits. Images lose sharpness and detail when they’re sized up and, unfortunately, Photoshop doesn’t offer an option to adjust these elements.
This is not an issue with ON1 Resize, a plug-in that’s compatible with Photoshop, Lightroom, Apple Aperture, or as a stand-alone program. I can’t recommend it highly enough, especially when it costs less than $60.
ON1 Resize is user-friendly. Each time it’s activated, it will prompt you to upload your photo, enter a value for DPI, which is typically pre-set at 300, and resolution. From there, you’ll be directed to a screen that offers up tutorials on best practices for preparing files for print.
I recommend viewing these quick 5-10 minute videos as they’ll help you get the most out of the software.
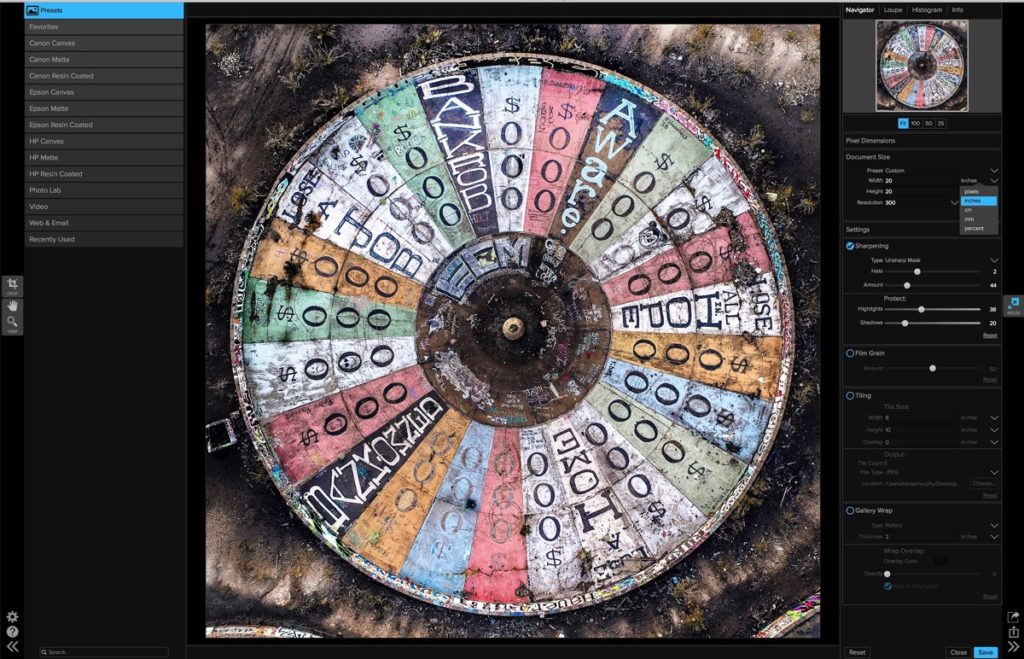
The ON1 Resize application
Once your photo is loaded in, the first place to start with is Document Size. Never, ever, send in an image that isn’t formatted for the exact dimensions of its output. If I want a 24 x 36-inch print, I’ll select Photography from the Custom menu, scroll down, and select that size.
ON1 gives you the option of manually entering the width and height, useful if you’re printing out a canvas, or select the dimensions that coincide with standard photographic and paper prints.
One tough reality is with certain sizes, you may need to crop out certain parts of your original composition but the program makes it easy to adjust how you want the final file to look.
Once the size is set, the next task is to sharpen the image for its specific size. For Type, I select High-Pass and take it down from the nominal value to 15.
This works for me but definitely experiment based on what you’re hoping to achieve with your image.
Finally, you’ll want to scroll down and Protect your highlights and shadows from being sharpened, otherwise it will induce noise in those areas and detract from the overall finish. A value from 18-20 should suffice for retaining quality.
A feature I’m going to quickly cover, located at the bottom of the right-hand menu, is Gallery Wrap. If you’ve ever mounted and framed a photo, you’ll understand how costly it is. A wrap is a less expensive alternative for displaying art on your walls.
Typically, a setback with a gallery print is that you have to sacrifice composition by allowing for at least an inch on all sides to be wrapped around the stretcher bars. With the Reflect option, the software will mirror the area so composition is not sacrificed.
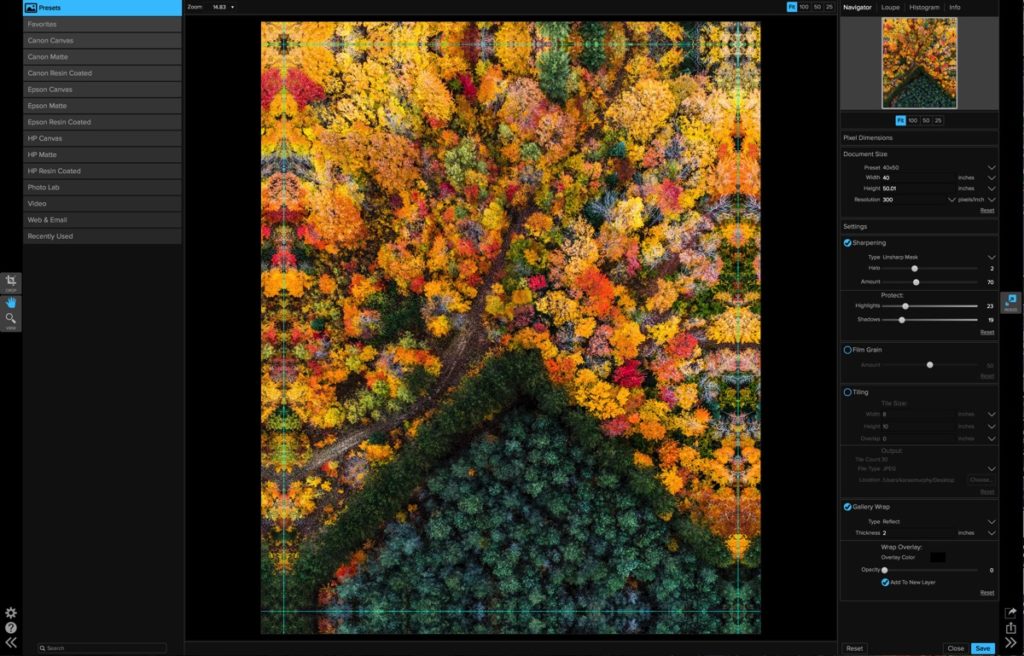
Wrapping the edges inside ON1 Resize application
Printing Options
There are tons of options available when it comes to printing. While some photographers opt to print their work on a home printer, I personally choose a lab. Home printers limit you when it comes to photo size and ink is incredibly expensive.
Print labs are a much more affordable option. If you’ve calibrated your monitor and edited your image accordingly, the lab technician won’t need to make adjustments. Disappointment and unexpected surprises are no longer of concern.
Overwhelmed with the number of options on the market, I personally sought out the advice of two widely respected experts, Chelsea and Tony Northrup. The couple tried out all of the major labs and crowned Mpix and Miller’s the winner when it comes to color grading and overall quality (side note: Dirk Dallas the founder/editor of this blog is also a big fan of Mpix).
A lab also offers up a variety of textures. For $1.00, I printed out 4 x 4-inch prints on varying finishes for a particular image to see which looked best and was pleasantly surprised.
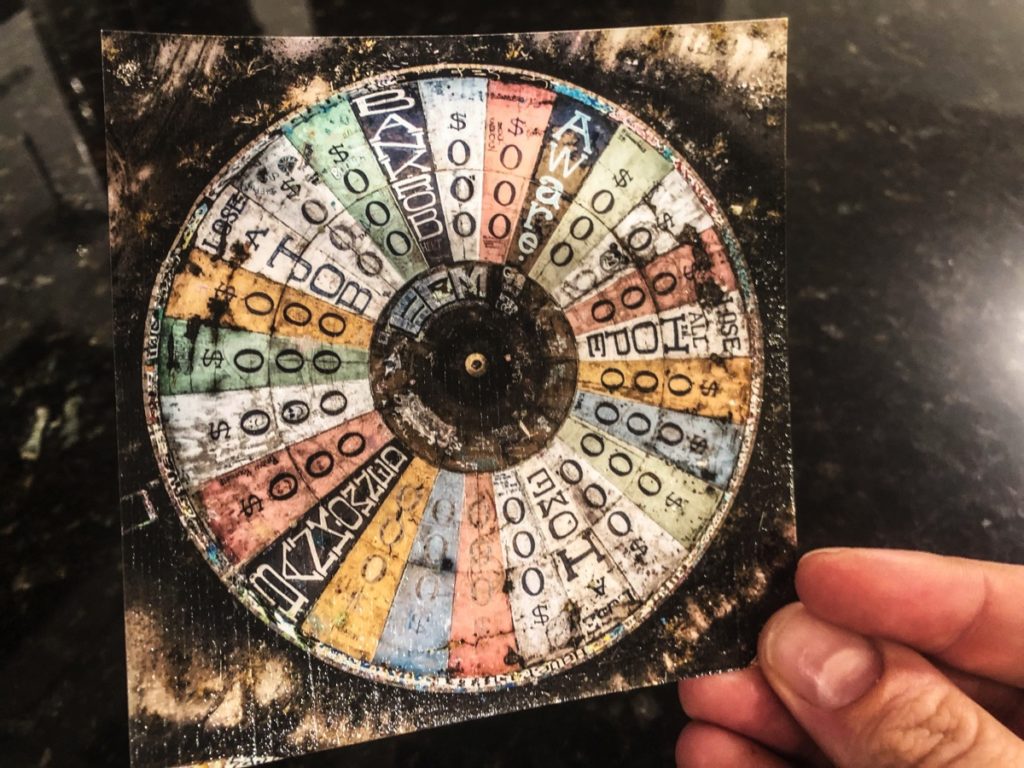
4×4 print on linen paper
Wrapping it Up
There aren’t adequate words to describe how wonderful it feels to physically hold a print of a photo you took on a digital device. It transforms it into a work of art.
Since you put a lot of time and effort into learning how to take incredible photos, and invested hard-earned money on equipment and software, the last sensible step to take is registering your work with the Electronic Copyright Office.
It’ll protect your work in the long run. If $35 sounds like a lot for an image, keep in mind that uploading them in batches is an option, though there is a different subset of rules involved. This article clearly explains how to properly complete the process.
It has never been easier or more cost effective to print and even sell your photos to friends, family, and collectors.
By following the steps outlined above, you can ensure that what you see on screen will cross over flawlessly to your medium of choice.
Let us know in the comments down below your successes and or mishaps with printing your drone photos.

Kara Murphy, known as @karaemurphy online, is a certified remote pilot, freelance writer, and artist living in Michigan.


wow amazing. informative and helpful article. its quite fascinating to read it. thank you and keep it up.
Thank you, that means a lot!
This is a very useful article! I have saved it already in my favorites so it will always come in handy for me. Thank you so much!
You’re welcome! I’m glad you found it useful.
Hey Kara! I’m doing some research and this article came up on google…look who the author is. I should have known when I saw my Wheel of Misfortune bucket list shot you did. I’m Printing a shot I did in antigua at a local print shop. It was pano on a mavic 2 pro. So…I think i want to scale it on canvas to 4 ft wide and 1.5 or two, but what should I do to it- you mentioned set it up before you send, so…HELP!!
Pingback: The Year’s Top 30 Drone Photos - On Sale Drones
Pingback: Printing Tips: How to Convert Your Drone Photos to Printable Files - On Sale Drones
Pingback: The Year’s Top 30 Drone Photos – – Twilight Buzz
Pingback: How to Convert Your Drone Photos to Printable Files – – Twilight Buzz