
Posted on January 15, 2017
In the world of aerial drone photography, the possibilities for creating an amazing image really starts to takeoff after you start editing.
And since editing photos is such an important part of my workflow since it is how I can tweak an image to my unique vision, I thought it would be helpful to do a big overview of 10 photo-editing applications to help you realize your full potential when it comes to photography.
Now there is a lot written about the first two popular options on the list, but the others, depending on your budget, can be great alternatives as well.
All the options offer a free trial and at the very end of this article I even link to a few basic free options to help you get your feet wet if you aren’t yet able to spend any money.
Except where noted, each program has the most important editing tools you’ll need such as brightness/darkness, contrast, saturation, sharpening, cropping, and re-sizing and they offer non-destructive editing which means any edits made won’t overwrite the original file.
So let’s get started!
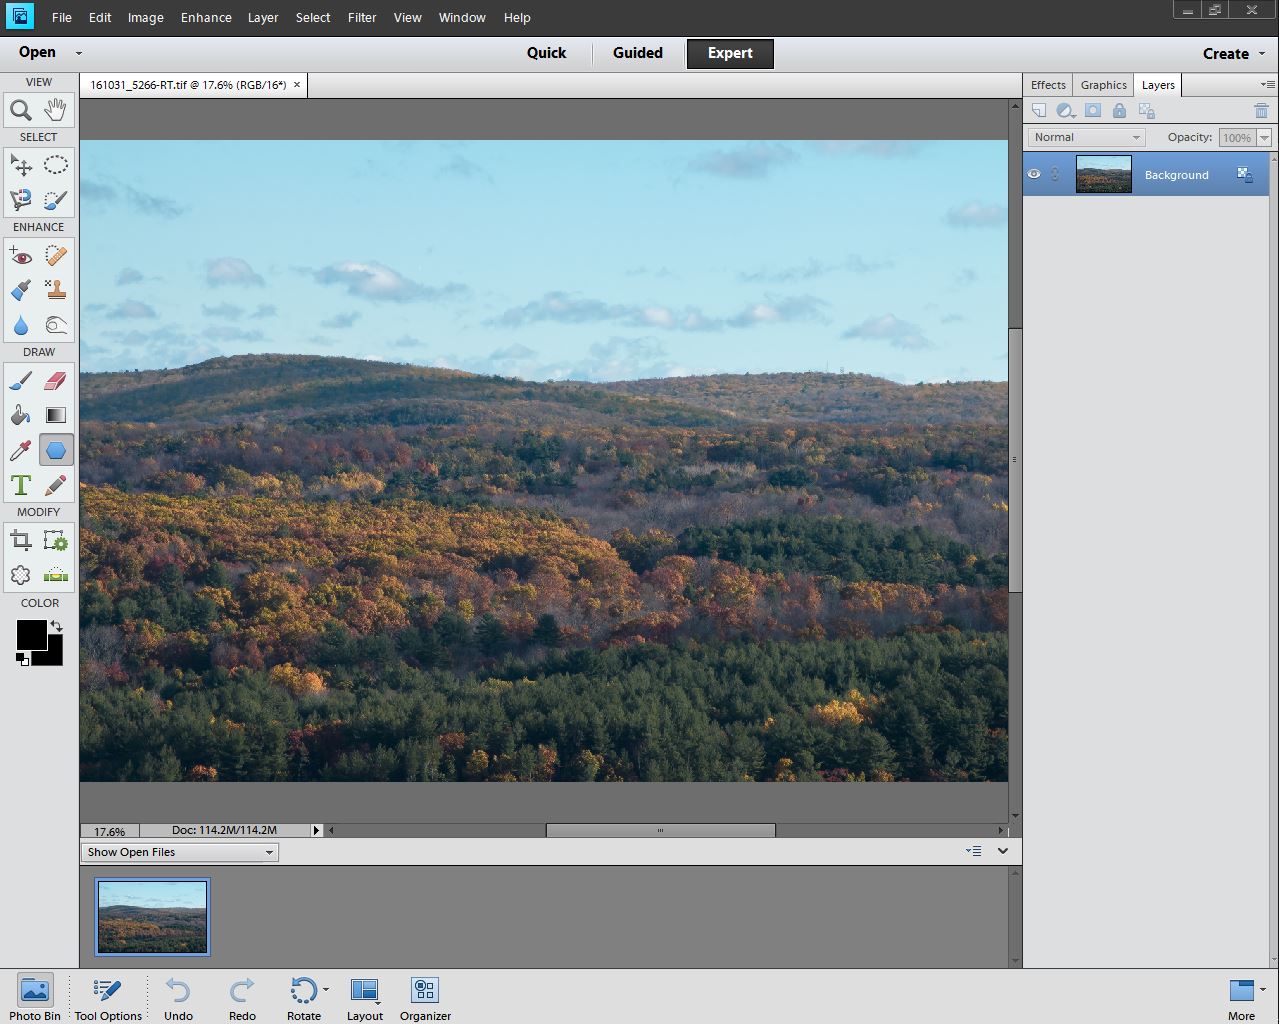
Adobe Lightroom
(Windows/Mac, subscription of $9.99/month, includes Photoshop, or you can pay $149.99 for the older version 6 stand-alone license, free trial here)
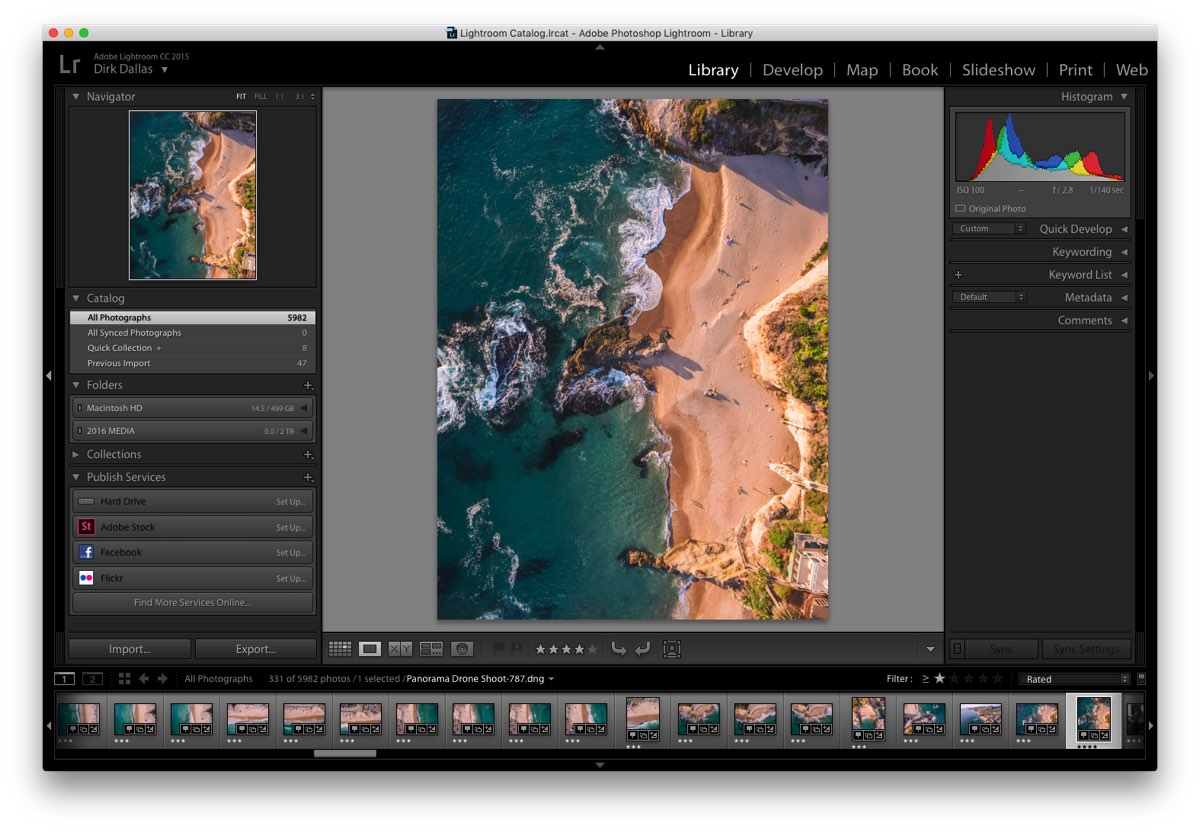
Adobe Lightroom is by far my favorite photo editing program from the whole bunch.
Ths is because Lightroom was created specifically for serious photographers and because of that it packs a lot of professional tools and features that are great for those looking for, in my opinion, the ultimate photo/image editing software on the market today.
Adobe Lightroom combines extensive image management capabilities along with powerful image editing tools.
Lightroom’s image management system is catalog-based, which means that all your images need be indexed, or imported into a central or individual catalog.
The catalog system in my opinion makes for organizing hundreds and hundreds of photos much easier to manage.
It also serves as a speed advantage to have a central place to manage a large image collection.
If you don’t like your photos being moved around then you can setup the app to have photos stay in existing folders.
Lightroom will let you edit tiff and jpeg files, but more importantly it offers integrated RAW processing.
This makes things a bit more seamless because most programs do their RAW processing in a separate module (like Photoshop).
With Lightroom you get 16-bit processing (opposed to 8-bit), full color management and when needed it can also handle 32-bit HDR files.
To learn more about the differences between 8-bit and 16-bit click here.
It’s important to note, that Lightroom is different from Photoshop in that there is no layer support.
But don’t fret, Lightroom makes it easy to integrate with other image editors that have that feature so if you want to quickly export an image right into Photoshop press Command + E.
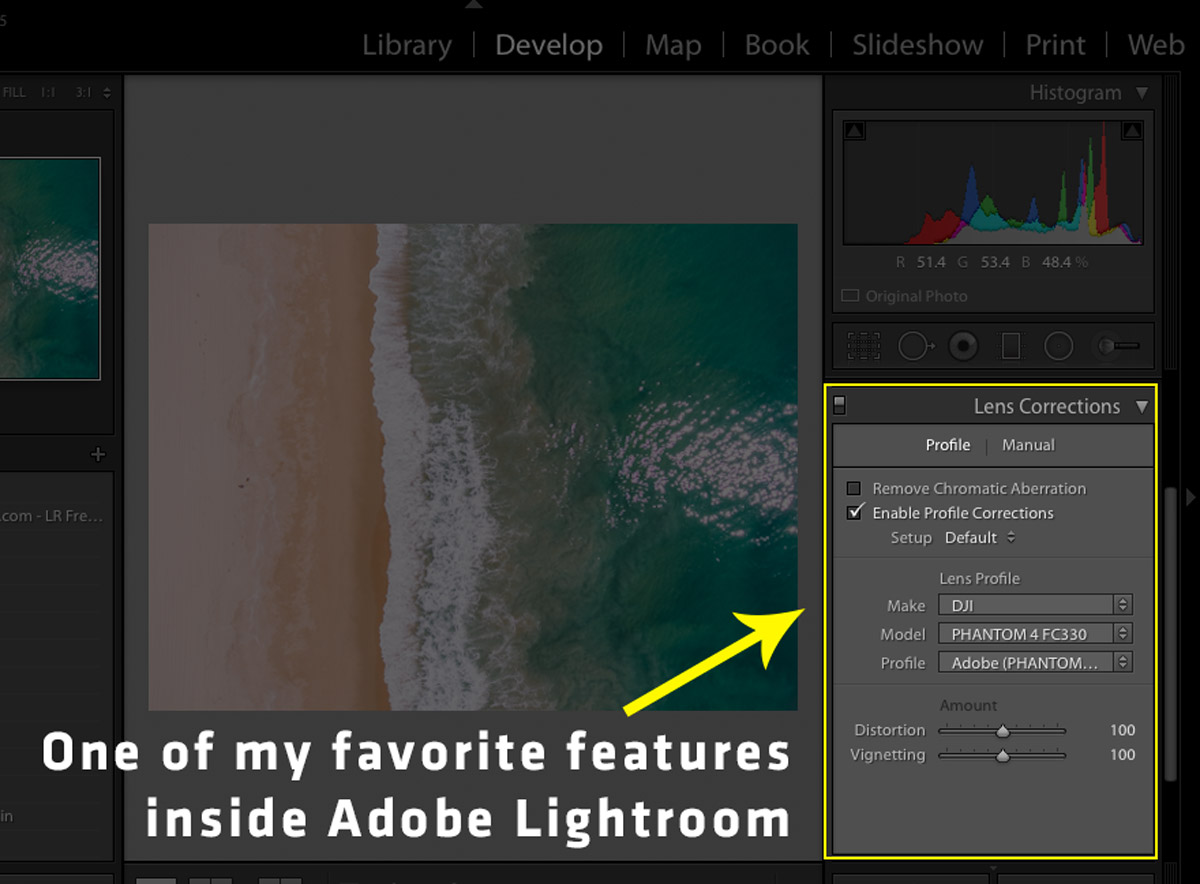
One major plus in my opinion for using Lightroom is that it comes with advanced lens correction tools and tons of camera profile presets.
The lens correction tools and camera profile presets are important because most camera lenses have some type of distortion.
So if for instance you have a DJI Phantom 4, you can apply the Phantom 4 camera profile inside Lightroom and the distortion will instantly be removed which gives you a better-looking image.
Some other handy features are Lightroom’s panorama tools, HDR merging tools, cloning and content-removal tools as well as modules that feature map and GPS data, altitude data, social media sharing, advanced printing, and book publishing settings.
You can also create your own presets or purchase some from 3rd parties which will greatly speed up your workflow.
If you’re interested in giving that a spin download my 12 FREE Lightroom presets here.
The last feature I will highlight that really sets Lightroom apart is the batch-editing features which allow you to quickly copy and paste edits on one or more photos in a flash.
You can also do that automatically if you turn on the auto-edit setting which can be helpful if you have a ton of photos that you want to have the same look.
Finally, and this is super important, there are literally thousands and thousands of easy to find and very helpful written tutorials and video tutorials around the web from Adobe, YouTube and other image focused websites.
If you interested in a Adobe Lightroom crash course then check out my tutorial: Adobe Lightroom Quick Start Crash Course.
Adobe Photoshop
(Windows and Mac, subscription of $9.99/month, includes Lightroom, free trial here)
Adobe Photoshop is synonymous with image editing and is by far the most popular image editing application of them all.
Whereas Lightroom was originally designed and developed for professional photographers, Photoshop was originally designed for designers and graphic artists.
But that doesn’t mean it isn’t a powerful tool for photographers as well, because it definitely is!
The main downside to using only Photoshop to edit your images is that you don’t really have an easy way to organize and search through all your photos.
That is why I personally like to use Lightroom to first organize and rate all my photos and then I will apply all my main edits to my favorite images.
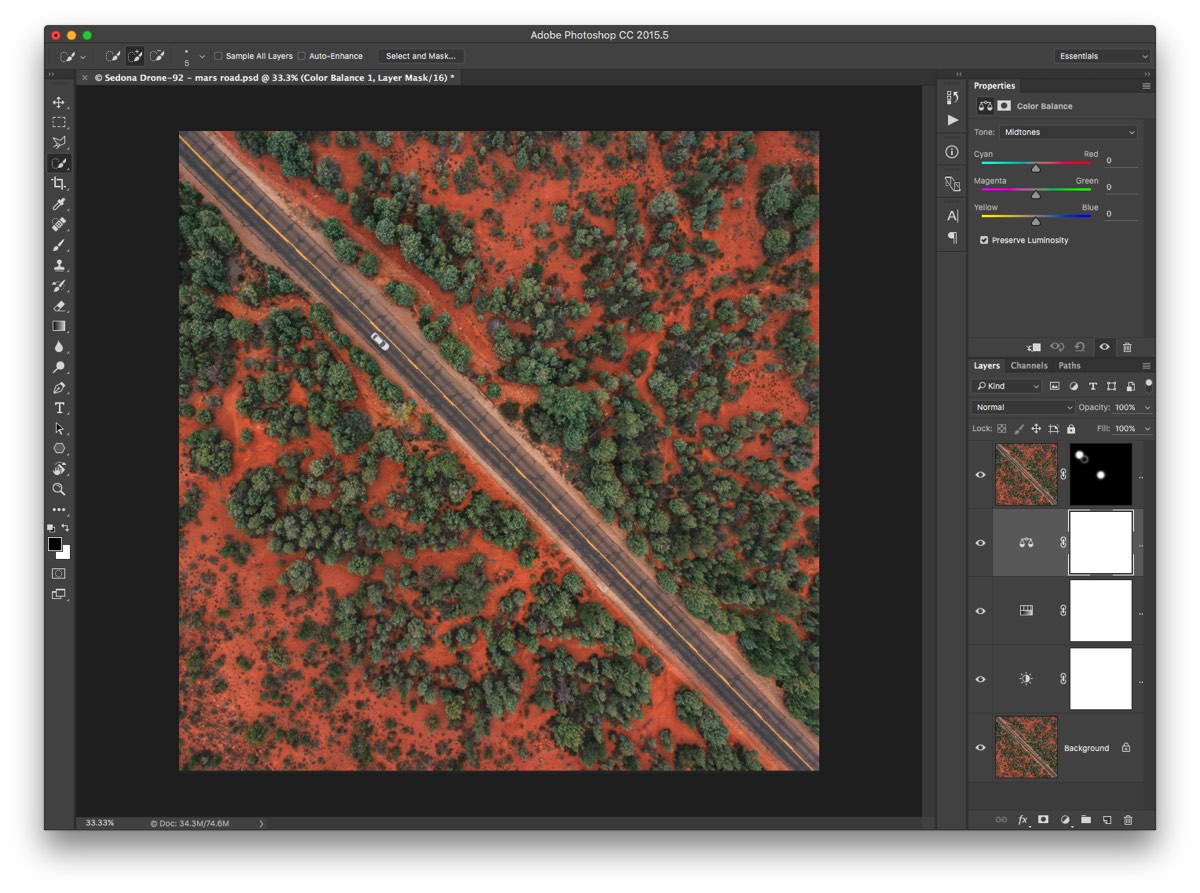
After that though, I will usually open up an image inside Photoshop to do some fine tuning/tweaking with selective edits and some compositing as a way to top the image off.
Because Photoshop is the industry standard for most creative professionals it offers an extensive array of editing, drawing, compositing and text tools all with 16-bit processing and full color management of RAW, tiff, and jpeg files.
Photoshop also has some great tools for creating HDR images, panoramas and masking/clipping tool which let you cut out objects from a photo.
Another plus for Photoshop is that it is compatible with a wide array of third-party plugins which make the app even more valuable because you can add in outside features and tools to further enhance your imagery or streamline your workflows.
Some of my favorite tools to use are the incredibly powerful content-aware removal tools, curves and the color balance tools for correcting the color and color grading my images.
Where I think Photoshop really excels is in its compositing tools.
These allow you to take 2 or more images and combine them into a completely new image. You can even replace an element like the sky so you can use a sky from a completely different photo.
Like Lightroom, a major plus is that there are thousands and thousands of written tutorials and video tutorials around the web from Adobe, YouTube and other image based outlets.
One downside that I should highlight might be the fact that you never really own any of Adobe’s software since you are either paying a monthly or yearly subscription fee.
I personally don’t mind that model though because it just means that whenever Adobe does a software update I am available to download the latest version and have access to any new features.
Adobe Photoshop Elements
(Windows and Mac, Adobe Elements ($99.99, free trial here)
Adobe Elements is often thought of as a super slimmed down version of Photoshop, but the reality is it offers most of the tools and features necessary for making a great photo.
The biggest difference from its big brother Photoshop, aside from some missing pro-tools, is that Elements is limited to a lower 8-bit processing (instead of 16-bit).
But that can be completely fine for photographers who primarily shoot in the jpeg format.
Elements does have a Camera Raw module which gives you the same RAW processing capabilities as Photoshop and Lightroom and it feature selection tools, layer processing, plugin support, and full-color management.
Because this is an Adobe product, there is extensive documentation of guides and tutorials as well as a large online community of Element users.
Chances are, if photography is more of a fun side hobby then Elements is probably all you need.
Corel PaintShop Pro
(Windows-only, $63.99 or $79.99 for the Ultimate edition, free trial here)
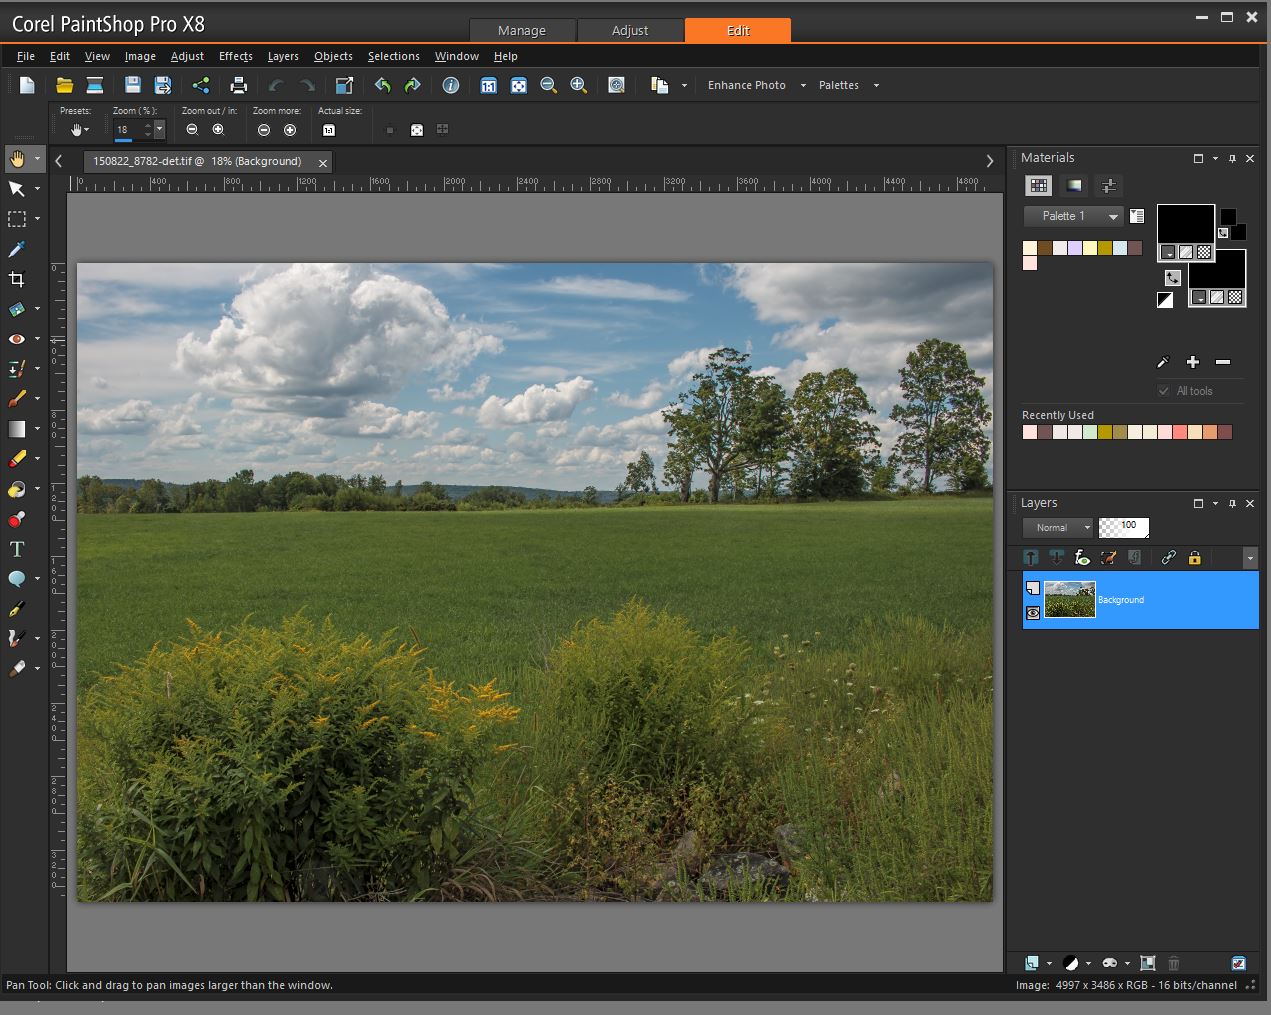
It features many comparable editing tools, like selection tools, content-aware removal tools, and layer support, along with many creative filters, text, and drawing tools.
Paintshop Pro is compatible with industry-standard plugins and Corel and a large dedicated online community publish tons of tutorials that show you how to perform various edits and mimic effects done in Photoshop.
Processing inside the application is 16-bit and it has some color management capabilities.
If you want to pay a little more for the Ultimate edition it does include a powerful program called AfterShot which allows you to process/edit RAW photos.
AfterShot also features pre-made correction filters, and a collection of brushes, textures, and backgrounds (read more about it down below).
The bottom line, if you can do it in Photoshop, there’s a good chance you can do it in PaintShop Pro.
Corel AfterShot Pro
(Windows, Mac and Linux, $79.99, free trial here)
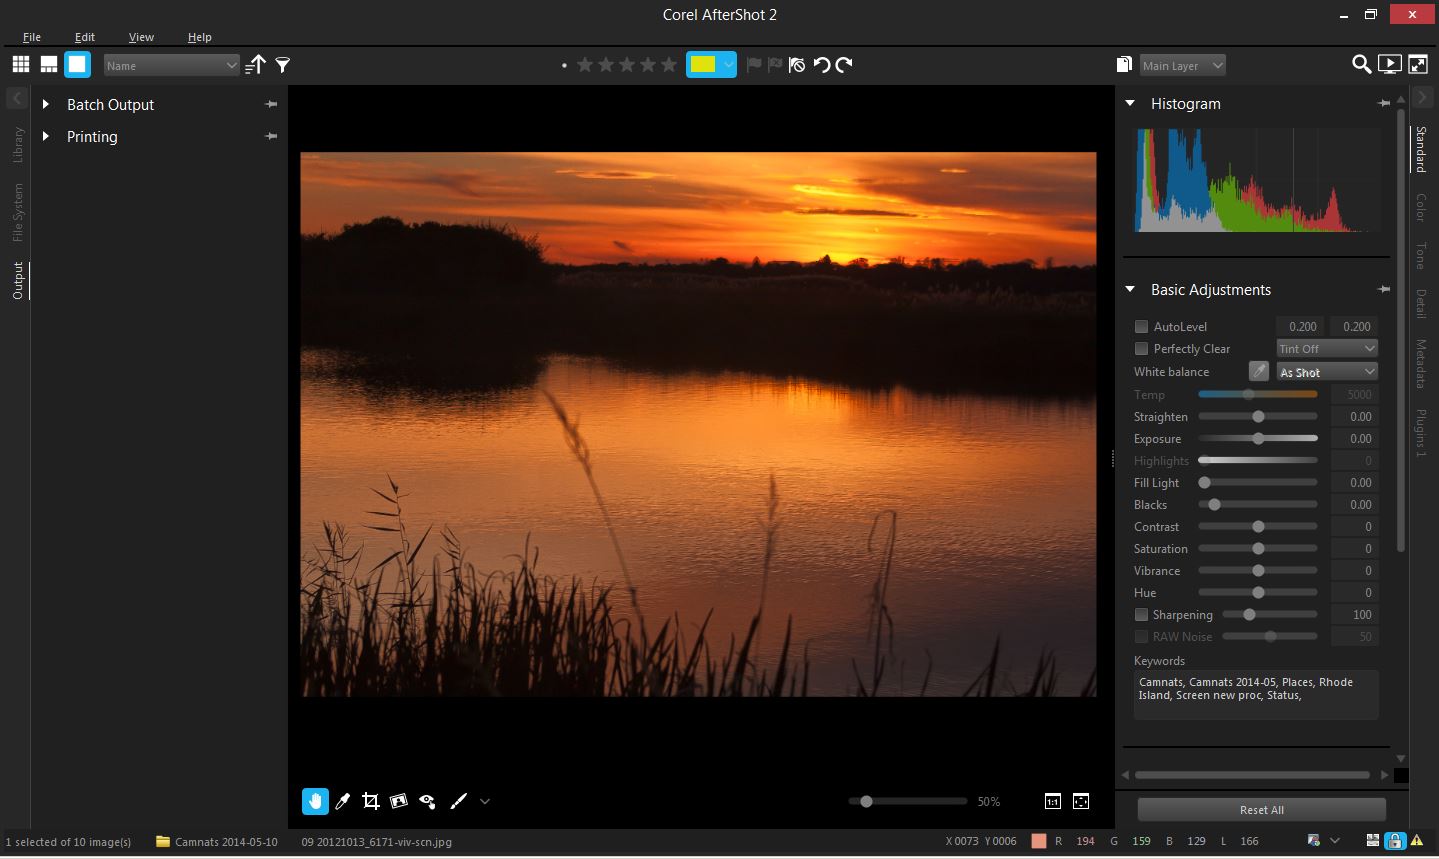
Another program from Corel is AfterShot Pro which is a fast RAW editor alternative to Lightroom. They claim that AfterShot Pro is 4x faster than Adobe Lightroom.
With this application you can edit and manage jpeg and tiff files as well. It too offers a choice of catalog-based or folder-based management for those who wish to implement a more customized management system.
There is built-in layer support (like Photoshop) and third-party plugins and filters are available. Some editing features include HDR support, highlight recovery, batch processing, non-destructive editing, lens correction, camera profiles, a preset library and fast batch processing tools.
AfterShot Pro is a great option to consider if you want a fast, powerful RAW editor and you don’t want to pay a monthly or yearly subscription.
GIMP
(Windows, Mac and Linux, Free)
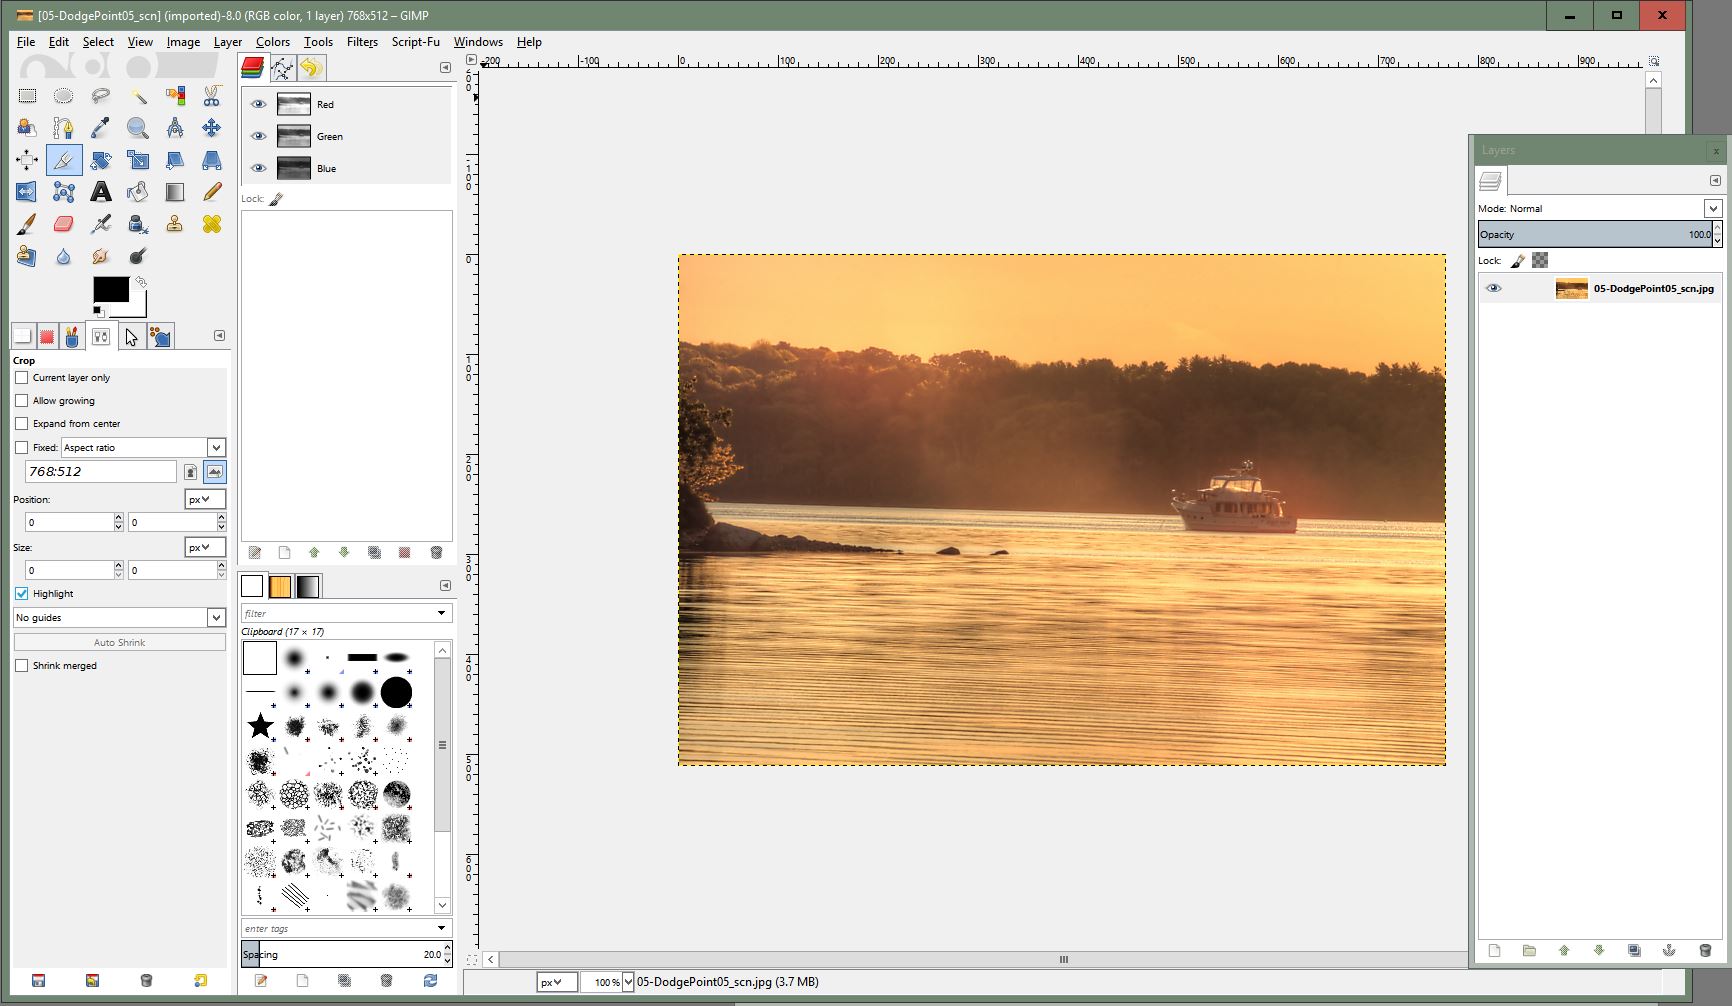
GIMP is one of the most popular free tools on the market.
It impressively has more tools than Adobe Elements, but I do need to point out that it only supports 8-bit processing.
A 16-bit version is in the works but we don’t know when that will be released.
Just like Elements and the Corel applications, if you can do it in Photoshop then you can probably do it in GIMP.
GIMP isn’t as robust as the application mentioned in the beginning of this article since there isn’t any management functions, but it does have a file browser to find and open pictures.
It’s fair to say that GIMP isn’t as polished as the paid programs, but it’s definitely still functional.
The GIMP developers provide good documentation and tutorials, and there are many independent power users and websites that offer tutorials and guides on how to duplicate Photoshop effects.
GIMP integrates with many third-party plugins and has a large selection of GIMP-specific plugins provided by the wider GIMP community.
It’s important to note though that some features like RAW processing and other advanced features must be done through plugins.
RawTherapee
(Windows, Mac, and Linux, Free)
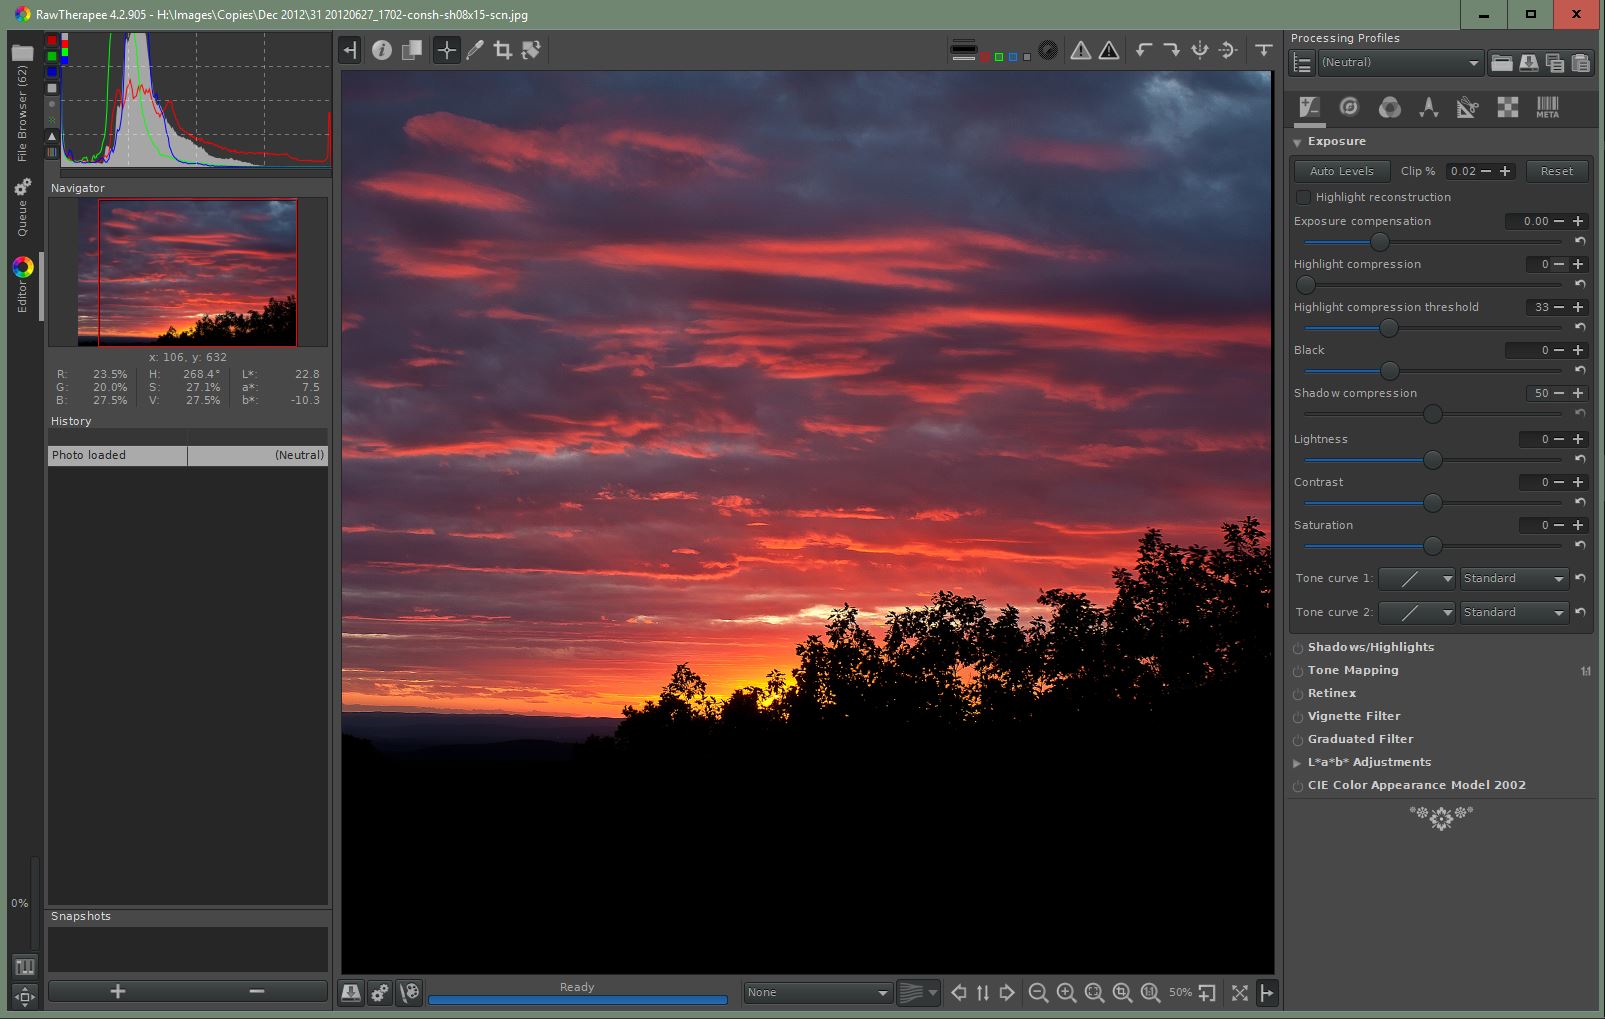
The main purpose of RawTherapee is to process and convert a large number of RAW files into other file formats.
RawTherapee impressively is able to export out 16-bit images and while it does contain some basic editing tools, you should use GIMP for more in-depth edits.
Many users looking for free image-editing tools use this application in tandem with GIMP because it can do all the RAW processing and plays nice with exporting out images for use in other applications.
And while not as vast as the offerings from Adobe and Corel, there is a reasonable amount of documentation and third-party tutorials.
Online Tools
My final three image editors are free online tools that are limited to editing only jpeg or png files (so no RAW file support).
These web applications can be great for those wanting to get their feet wet with editing their photos or for those who are away from their usual editing setup and just need a quick way to edit and share a photo that only requires basic adjustments.
Each one has only a few options for selective editing, but they do offer fast processing and sharing directly on the web if detailed/advanced adjustments are not needed.
Aviary
Aviary has the largest variety of adjustments and effects, and is available to use once you get a free Adobe account.
Picmonkey

The free version of Picmonkey is the most basic of these choices, although the paid version promises more creative filters and features.
Pixlr
Pixlr has a basic toolset and user interface that is similar to the other apps we have reviewed.
Honorable mention: Affinity
I haven’t yet had a chance to play with this app but I have read some great things about it. So if the options above aren’t quite what you are looking for, then check out Affinity.
Well that’s it! I hope this was helpful to you!
If you’ve been hesitant to finally dig in and start learning how to really edit your photos or you have been holding off on going the extra step to process your images in the RAW format then it is my hope that you now see that there are options that range all across the board from paid ones to free ones.
So pick a program and give it a shot, you’ve got nothing to lose especially since each option either offers a free trial or is completely free!
If you’re already experienced with editing your drone photos, what software program is your favorite to use right now and why? Leave a comment below and let me know!
For further learning:
• If you’re looking for some suggestions on programs/applications for editing your aerial drone videos then check out this post 5 Useful Tools for Drone Videography Post-Processing
• If you’re looking for some tips and advice on how to shot and edit your still aerial drone photos then check out this post 8 Tips for Better Drone Photography
If you enjoyed the post could you please do me a HUGE favor and share it?
This blog is simply a hobby and labor of love and your support truly does help in keeping this website going!
Thanks so much!
Have a question or comment? Feel free to contact me directly at [email protected] or just drop a comment down below.
About this site
 Dirk Dallas, also known online as @dirka, is the founder and curator of From Where I Drone, a blog dedicated to inspiring and teaching drone pilots how to create better aerial photos and videos.


If you are mobile editiing; Ilove Snapseed
Pingback: 8 Tips for Better Drone Photography -
Pingback: 5 Useful Tools for Drone Videography Post-Processing -
After Shot Pro will not recognize RAW files shot on the DJI Phantom 3 and 4. Gimp will not recognize them either…
Been looking into this, this issue is it needs a profile for the DJI camera, which it doesn’t have. I’m investigating making a profile, could be one answer.
What are your thoughts on the native mac photo editing software, Photos?
Thx!
Gimp editor is great and free! No ads
Thanks for the comment!
The photo editing tool list is useful for creators preparing visual assets before publishing. I use the same idea with animated GIFs and compress them before upload because dimensions and frames can make previews heavy. That keeps pages easier to load.